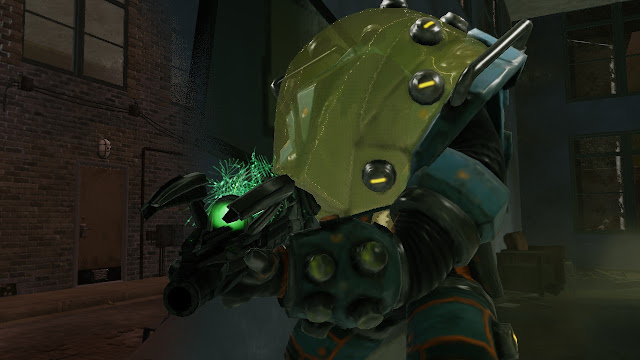
The actual animation for Acid Blob is a bit confusing. The concept is that the Andromedon is venting some of the caustic fluid in its suit as a makeshift attack, which is sensible enough, but then the animation is that the Andromedon points its gun slightly upward, charges it for a couple seconds, and then the blob of acid shoots out at an appropriate angle. I'm not entirely sure there's an appropriately-placed tube or anything to draw such a connection, but even if there is it's still pretty weird. Using a weapon that's designed to fire some kind of laser-looking thing to instead gather caustic fluid into a blob and then launch it as a grenade is a pretty weird scenario; I'd really expect the fluid to be released some other way, from something more directly attached to the suit itself.
I'm unsure if this is a cobbled-together last-minute animation or something actual thought was put into and janky in the final product for other reasons. While the base game wasn't blatantly rushed like War of the Chosen was, there's a few bits and pieces concentrated toward the late game that suggest the game was, in fact, rushed a bit; it wouldn't surprise me if the animation strangeness here is an example of such.
But it could just as easily be that the devs just didn't think it was strange.
 The Andromedon is the single most difficult to kill enemy in the entire game short of the Chosen and the endgame 'boss' enemies. Aside high-end Chosen and high-difficulty Avatars, no other enemy in the game has comparable Armor while still being able to make use of Cover, and the Andromedon has some innate Defense to boot, giving them an alarming 50 Defense when standing in High Cover. Being immune to all damage over time effects further contributes; in conjunction with not being susceptible to Bluescreen Rounds, your peak damage potential against an Andromedon is noticeably lower than against literally every other enemy in the game, since no damage-boosting Ammo works against them. Chosen and Alien Rulers will still take more shots to kill thanks to their raw HP advantage, but that's really it for enemies inarguably slower to die than an Andromedon.
The Andromedon is also part of the trifecta of endgame enemies that you normally only encounter one per pod, are ridiculously hard to kill, are able to smash through walls as they move, and hit very hard. It should always be one of your highest-priority targets, and indeed is probably the single best target in the game for lobbing terrain-wrecking explosives at, since it has incredible Armor while also taking Cover. Shredding their Armor while wrecking their Cover is very important if you want to reliably kill them in a timely manner: try to get Plasma Grenades online before they show up.
As Andromedons rip through the HP and Armor of your soldiers fairly effortlessly, it's quite important to kill them quickly. They're not quite as lethal as a Sectopod or a Gatekeeper, but it's a lot more important to leverage the pressure you put on them right away: if you take out an Andromedon's Cover but fail to kill it, it's going to run to a new position, and if you're out of explosives at that point you may be unable to do anything to force hits on it. In fact, if you end up with the last move of the turn being your explosives-hurler, you may well want to hold off on tossing it until next turn so you can properly leverage blowing their area up.
The Andromedon is the single most difficult to kill enemy in the entire game short of the Chosen and the endgame 'boss' enemies. Aside high-end Chosen and high-difficulty Avatars, no other enemy in the game has comparable Armor while still being able to make use of Cover, and the Andromedon has some innate Defense to boot, giving them an alarming 50 Defense when standing in High Cover. Being immune to all damage over time effects further contributes; in conjunction with not being susceptible to Bluescreen Rounds, your peak damage potential against an Andromedon is noticeably lower than against literally every other enemy in the game, since no damage-boosting Ammo works against them. Chosen and Alien Rulers will still take more shots to kill thanks to their raw HP advantage, but that's really it for enemies inarguably slower to die than an Andromedon.
The Andromedon is also part of the trifecta of endgame enemies that you normally only encounter one per pod, are ridiculously hard to kill, are able to smash through walls as they move, and hit very hard. It should always be one of your highest-priority targets, and indeed is probably the single best target in the game for lobbing terrain-wrecking explosives at, since it has incredible Armor while also taking Cover. Shredding their Armor while wrecking their Cover is very important if you want to reliably kill them in a timely manner: try to get Plasma Grenades online before they show up.
As Andromedons rip through the HP and Armor of your soldiers fairly effortlessly, it's quite important to kill them quickly. They're not quite as lethal as a Sectopod or a Gatekeeper, but it's a lot more important to leverage the pressure you put on them right away: if you take out an Andromedon's Cover but fail to kill it, it's going to run to a new position, and if you're out of explosives at that point you may be unable to do anything to force hits on it. In fact, if you end up with the last move of the turn being your explosives-hurler, you may well want to hold off on tossing it until next turn so you can properly leverage blowing their area up.
Archons were your early warning that the game was going to get serious soon: Andromedons are the game getting serious now.
Andromedons are actually one of the cooler Domination targets in the game, able to soak a tremendous amount of punishment from most enemies (Most enemies don't have Shred, or are reluctant to use their source of Shred, so their Armor tends to go farther than you might expect), dish out decent damage, keep up with your team wherever they might go, and punch holes in walls for you on demand by simply waltzing through them. It's entirely possible for an Andromedon to be Dominated in the first pod you encounter and survive all the way to the end of the mission with you, having contributed quite effectively and regularly throughout. Their Will is high enough you can't pull it off reliably, but it can still be worth fishing for once in a given fight.
Mind, Dominating an Andromedon has its risks, specifically how it interacts with what happens when an Andromedon dies...

Andromedon Shell
HP: 14/14/18/21
Armor: 0
Defense: 0
Dodge: 0
Aim: 75 (60 in practice)
Mobility: 12/12/15/15 (8/16 on Rookie and Veteran, 10/20 otherwise)
Damage: 7-10 (+4)
Shred: 0
Crit Chance: 0/15%/0/0
Will: 50
Tech: 80
No, I didn't mess up the crit chance portion of the table. The files give no crit chance to the Andromedon Shell outside Veteran difficulty, and 15% on Veteran. I'm assuming that's not the intended pattern and it was just overlooked because enemy crit chances are invisible and you almost never get punched by a Shell anyway. By a similar token its lower difficulty HP is inconsistent with the live Andromedon's HP, even though its higher difficulty HP is identical. More evidence the dev team's focus was on playtesting Commander and Legend...
 Robot Battlesuit
Replaces an Andromedon when the Andromedon dies. Immune to Acid.
So yeah. On top of all their conventional durability, Andromedons don't even properly die when you kill them!
Mechanically, the Shell is 100% a brand-new unit, which has assorted kind of weird implications. For one thing, it means status effects don't persist; this mostly isn't very important, as the suite of immunities across both forms is such that not many statuses could be applied to a live Andromedon and then expect to persist to the Shell (You can Dominate an Andromedon, but not a Shell, same for Disorientation, etc), but Stun and, if you have Alien Hunters, Freeze, are both very notable exceptions. If you have a live Andromedon frozen or Stunned, you may wish to hold off on killing it just yet, so you don't let loose the Shell before your team is ready to kill it. Holo Targeting is also something that can affect both forms but is lost in transition, which I don't consider a notable exception because Shells are so easy to hit and Andromedons show up so late in a run your squad should generally be getting 100% hit chances against the Shell regardless, but it's still something to keep in mind when planning your turn, especially if you're either not fond of prioritizing Scopes/Perception PCSes or have had particularly bad luck in a run when it comes to them.
The other relatively significant mechanics point to keep in mind is that there is no 'carry-over' when it comes to damage. Killing an Andromedon with a 10-damage attack will result in a full-health Shell regardless of whether the live Andromedon had 10 hit points or 1 hit point when you shot it, and more pressingly multi-shot actions can be wasted if they're overkill: using Chain Shot on an Andromedon with 1 HP won't result in the second shot re-targeting to the Shell, it'll just waste Chain Shot, putting it on cooldown with no possibility of benefit. Banish backed by Annihilate is an exception, of course (Though the animation end of things copes poorly), but otherwise you shouldn't be careless with multi-shot actions. (Well, if you're playing the base game, you can be pretty free with Rapid Fire, given it has no cooldown there... but in War of the Chosen it has a 5-turn cooldown, so you need to pay attention and avoid wasting it)
A more narrow point to keep in mind is that killing the live Andromedon counts as a kill for eg Serial, Reaper-the-skill, Soul Harvest, etc, even though the Shell keeps going. This slightly bumps up the relevance of Serial and Reaper-the-skill once Andromedons start showing up, since even a single pod can produce a 4-kill-streak if you line things up right. It also means Andromedons slightly increase your average experience gain -to the best of my knowledge, they provide one kill of experience per form, with no Lost-type reduction in experience awarded per target.
Also a little weird is that a live Andromedon can drop loot when initially killed, rather than the loot being assigned to the Shell. Indeed, Shells are one of the only mid-mission-generation enemies that can't roll for droppable loot!
Anyway, this is why Dominating a live Andromedon can end badly: because when it dies, you'll end up with the Shell under enemy control! This is particularly problematic in the base game, as an Andromedon dying during the enemy turn will result in the Shell getting an immediate full turn. Much like Codex cloning, War of the Chosen fixes this so a Shell spawned during the enemy turn doesn't take action until the following enemy turn, thankfully. Indeed, in War of the Chosen Andromedons are arguably one of the best Domination targets, as the Andromedon corpse is not dropped until the Shell dies: as such, where normally Domination is costing you the corpse unless you do shenanigans to lose control before it dies, in the Andromedon's case it's actually ideal to have it die while Dominated in War of the Chosen.
Incidentally, Andromedons are another good scout for revealing Burrowed Chryssalids, since they take negligible damage from Chryssalids, don't get infected, and even have innate Defense to reduce the odds of being hit in the first place. The opportunity isn't prone to cropping up, but if you get that situation it's great to take advantage.
Anyway, the icon above is actually used in-game for the Andromedon Shell's suite of immunities, but said suite of immunities is literally just...
 Mechanical Chassis
This unit is a robot, rendering it immune to Poison, Fire, and Chryssalid Poison as well as most psionic or mental effects (Including that it will never Panic or be rendered Unconscious), but susceptible to anti-robot effects and impossible to heal with Medikits.
...
that it's a robot, but also immune to Acid like the live Andromedon. I'm not sure why the devs didn't just give the Shell Mechanical Chassis and the Andromedon Immunities ability/icon with the latter specifying their Acid immunity.
In any event, the Andromedon turning into a robot on death gives it a unique and rather strange relationship to Bluescreen Rounds (And other anti-robot measures, I guess), as they help quite a lot... against its vastly less threatening stage. If you brought Bluescreen Rounds for other reasons, sure, go ahead and try to arrange for them to be pointed at the Shell instead of its living self, but if you're seeing Andromedons listed by the Shadow Chamber, that shouldn't be a motive to equip Bluescreen Rounds. Take AP Rounds or even Tracer Rounds, instead, they'll actually help with the dangerous first stage.
The Shell is also mildly interesting as robots go for completely lacking Armor. Every other unit that is susceptible to hacking and so on has at least one point of Armor on all difficulties, usually multiple points. It's especially surprising given that the live Andromedon is one of the most heavily Armored units in the game. You'd tend to expect the Shell to be similarly Armored, maybe inherit whatever Armor the live Andromedon had when it was killed, but nah, Shells always have 0 Armor. I'm curious if this was primarily a technical decision ("We want to have Armor inherit, but can't figure out how to get the engine to cooperate in a sane way") or if the dev team just thought it made sense for the Shell to be lacking Armor due to its catastrophic battle damage.
Whatever the case, Andromedon Shells are also another example of a robot enemy that can actually flee in response to casualties... but you could be forgiven for thinking Shells are a fearless exception, as they only rarely run, even if you have a habit of leaving them alive for a turn. I suspect this has to do with them being, mechanically, a wholly separate pod from anything else, rather than considering themselves to be a part of the pod the Andromedon was attached to when alive, as my experience is that enemies are prone to running in response to their pod taking severe casualties, and only rarely retreat in response to other pods taking severe casualties. Whatever the reason, don't just assume a Shell is going to stick it out and charge your forces: it usually will, but not always.
Admittedly a Shell isn't a big enough danger for it to be a big problem for them to go join another pod, typically, but it's still generally better to take it out instead of letting it get away.
 Hardened
Does not use Cover, but is never considered to be in the open.
A semi-regular janky situation to keep in mind is that if a live Andromedon is killed while in High Cover, the resulting Shell will cease to be visible to anyone who isn't more or less flanking its position, since the Shell won't be using the peek-out mechanics. If you're not keeping this point in mind and kill an Andromedon with accuracy-bypassing effects (Or raw luck) you can find yourself unable to follow up and kill the Shell, potentially creating problems if one soldier is in easy punching reach. This is one reason it's generally best to chuck Plasma Grenades or similar at an Andromedon: to minimize the odds of its Shell being safe from your squad.
An additional weird wrinkle to it is that the Shell will actually start out in a kind of inactive state if none of your squad can see it. You can tell because it actually has both walk and run animations: in spite of by definition being a product of violence, you can end up with a Shell walking casually out as its first action, noticing your squad, and spending its second action point in a running animation. This can happen even if other enemies are around and can see your squad, in fact! Which makes it a little less dangerous to kill an Andromedon in High Cover, assuming none of your squad will have sight on the resulting Shell.
Regardless, this is important to keep in mind if you were keeping a Bluescreen Rounds soldier in reserve, waiting for other soldiers to kill the Andromedon before bringing the Bluescreen to bear on its Shell. Either blast their Cover as part of the process or make sure the Bluescreen Rounds soldier isn't relying on the Andromedon peeking out to get a line of fire.
Outside this particular weirdness, the Shell isn't any more prone than other Hardened enemies to hiding itself, and in fact is somewhat less prone to doing so since it retains...
 Wall Smash
Can walk directly through destructible terrain freely, destroying it.
... this, of course.
Unlike an Andromedon whose pilot still lives, a Shell will always trample through everything in its way, never hopping over Cover or the like. This makes them hilariously prone to screwing up their allies' Cover, which is one reason why it's generally better to focus on the live Andromedon but shift its Shell to a lower priority: the Shell is a lot more likely to accidentally help your squad.
Shells are also just generally more prone to picking smashing-oriented paths. Live Andromedons can run though a wall to get a flanking position, but will often react to eg finding themselves on the other side of an ADVENT building's walls by staying on their side, taking potshots through the laser-fenced windows. The Shell will inevitably charge right on in, punching a hole and potentially ripping into a soldier's Cover, exposing them to fire from other enemies.
It's good to get in the habit of identifying and prioritizing indestructible Cover when Shells are a concern.
Overall, though, not too different from the live Andromedon's access to the same.
 Acid Trail
As the Andromedon Shell walks, each tile it passes through is filled with a cloud of acid that will inflict Acid Burn on units that pass through while the cloud still lingers. These acid clouds last exactly one turn, and do not move.
I assume this is meant to be dripping out of the cockpit area, since that smashes open and fluids are animated as leaking from it.
Most of the time, this is more flavor than anything else. It's rare you'll need to path a soldier through the Acid trail in the one turn it lasts, even if you're very fond of melee combatants and don't have Acid immunity on said melee combatants.
Do note you can't sneak through a line trailed by a Shell regardless of its exact pathing. A Shell walking diagonally will produce a trail you might intuitively expect to be able to slide through unaffected by going diagonally at a right angle to the trail (ie if the Shell went East-West, you would walk North-South), but you'll still end up considered passing through an Acid tile. I'm... not entirely sure how the game achieves this, honestly, as the game is, for all other purposes, happy to treat walking through a corner as not interacting with the other two tiles sharing the corner being walked through, including that with other cloud-producing effects you can sidle right past two clouds by cutting through the corner between them. This really seems to be some Acid Trail-specific special behavior.
Still, this is surprisingly rare in its relevancy, and somewhat comedically the Shell only leaves Acid behind it. Killing a Shell will result in it visually collapsing and spilling acid all around, but mechanically there won't be any Acid produced, not even in its own tile: this is part of why Acid Trail is often irrelevant, as killing the Shell will basically always provide a path through its trail even if it happened to cut off a chokepoint.
It's too bad it's so ignorable a mechanic. I really like the flavor of it, but it just... basically doesn't matter. It doesn't help that Acid has no immediate affects: walking through and then having a Medikit used on the individual (Such as remotely via a Specialist's Medical Protocol) will clear the Acid before it has the chance to do anything at all. You'd think walking through Acid would Shred Armor or something, but nope...
 Fist Strike
The Andromedon Shell's only attack is a melee attack, wrecking the target's Cover as well as nearby destructible terrain, but with a -15 Aim penalty. This melee attack also has a chance of knocking the target back, up to 3 tiles away, assuming it hits.
This makes Shells even more predictable than live Andromedons: if a single soldier is in reach to move and then punch, the Shell will always try to do exactly that. Simple, because that's their only direct tool for contributing to a fight.
Since they also retain the just-immediately-punch-if-adjacent behavior, Shells are also even more easily trivialized by Parry Templar, Untouchable soldiers, or even using Suppression to slash their hit chance to 10%!
 The Shell itself is massively less threatening than a live Andromedon, having lost use of the firearm (Its power source visibly stops glowing, and the weapon breaks) and also lost access to the Acid Blob attack. As the melee attack is still not a move-and-melee attack, it's entirely possible for the Andromedon Shell to be unable to reach any of your people on its first turn in existence. And given its high HP is its primary protection, it's fairly easy to kill it at your leisure, regardless of your squad composition. While a live Andromedon is generally a high priority target, its Shell is often better to put off until you've dealt with ranged and move-and-melee threats in the area.
It's still got enough HP to soak a decent amount of punishment, and for a first-time player who doesn't know about the Shell gimmick it can be quite a nasty surprise to just barely pull off killing the Andromedon, only to have its Shell go on to punch someone's lights out, so don't treat it like a complete non-threat, but so long as it isn't in anyone's face it can be put off. And depending on who is in its face, it may still be acceptable to put it off...
It's also one of the more easily hacked robots in the game. Whether you want to shut it down to make it even easier to ignore, or take control of it for your own ends, you've got good odds of things working out. Just remember to account for its Acid trail, particularly in confined spaces: you may be accidentally laying walls of Acid that make it a bad idea to send people places you'd intended to send them. Consider moving it last, to minimize the problems posed by this, especially if it isn't in punching range of anything anyway. Also remember that the Shell isn't a particularly great combatant, especially since many late-game enemies have 10 Defense and so the Shell needs to win a coin-flip to hit anything. It can still be good for demolishing Cover and other environmental features, though, not to mention for distracting enemies. The AI likes to take higher-percentage shots, so the Shell tends to draw disproportionate fire due to its lacking Defense, and then stays up longer than a similarly-durable Cover-using unit since it's never considered to be in the open. So it's a pretty solid distraction, probably the best of the hackable enemies as a matter of fact, especially since leaving it alive to un-hack and turn on you isn't that threatening.
The Shell itself is massively less threatening than a live Andromedon, having lost use of the firearm (Its power source visibly stops glowing, and the weapon breaks) and also lost access to the Acid Blob attack. As the melee attack is still not a move-and-melee attack, it's entirely possible for the Andromedon Shell to be unable to reach any of your people on its first turn in existence. And given its high HP is its primary protection, it's fairly easy to kill it at your leisure, regardless of your squad composition. While a live Andromedon is generally a high priority target, its Shell is often better to put off until you've dealt with ranged and move-and-melee threats in the area.
It's still got enough HP to soak a decent amount of punishment, and for a first-time player who doesn't know about the Shell gimmick it can be quite a nasty surprise to just barely pull off killing the Andromedon, only to have its Shell go on to punch someone's lights out, so don't treat it like a complete non-threat, but so long as it isn't in anyone's face it can be put off. And depending on who is in its face, it may still be acceptable to put it off...
It's also one of the more easily hacked robots in the game. Whether you want to shut it down to make it even easier to ignore, or take control of it for your own ends, you've got good odds of things working out. Just remember to account for its Acid trail, particularly in confined spaces: you may be accidentally laying walls of Acid that make it a bad idea to send people places you'd intended to send them. Consider moving it last, to minimize the problems posed by this, especially if it isn't in punching range of anything anyway. Also remember that the Shell isn't a particularly great combatant, especially since many late-game enemies have 10 Defense and so the Shell needs to win a coin-flip to hit anything. It can still be good for demolishing Cover and other environmental features, though, not to mention for distracting enemies. The AI likes to take higher-percentage shots, so the Shell tends to draw disproportionate fire due to its lacking Defense, and then stays up longer than a similarly-durable Cover-using unit since it's never considered to be in the open. So it's a pretty solid distraction, probably the best of the hackable enemies as a matter of fact, especially since leaving it alive to un-hack and turn on you isn't that threatening.
 Unsurprisingly, the Shell does not have a separate Autopsy, and as noted earlier you don't see an Andromedon corpse drop until the Shell is destroyed. (Which, mind, doesn't matter much unless you're playing with mods that modify the corpse retrieval mechanics, since it's not possible to knock the Shell Unconscious or otherwise kill the first stage and end up not looting the body in a loot-possible mission. It's only Domination that makes it matter at all, by default)
Anyway, the Andromedon's Autopsy has the rather bizarre effect of unlocking Proximity Mines, as opposed to the Acid Grenade you would logically expect to get from Autopsying an enemy that has what amounts to an Acid Grenade as an attack. I'm genuinely surprised the devs didn't simply swap Proximity Mines with Acid Grenades, in terms of acquisition.
Regardless, Proximity Mines are actually surprisingly good, so this is a decent Autopsy to somewhat prioritize. The fact that Proximity Mines are fairly Supply-intensive is often not much of an issue, since Andromedons are generally showing up in the phase of the game where Supplies are largely ceasing to be a serious limiter.
This is good, because Andromedons are uncommon enough and show up late enough you'll generally not hit the Instant threshold, even in the base game, demanding you actually spend lab time on it if you want it. It's nice to have a worthwhile payoff for expending real lab time.
A bit of a hit to the relevancy of Proximity Mines in War of the Chosen is the Chosen loot researches, as they tend to be arriving in the late game and are much better researches to prioritize. It's entirely possible to end up unable to justify spending lab time on the Andromedon Autopsy because you're busy with Shadow Projects and Chosen Loot -and Alien Ruler Autopsies, if you have Alien Hunters and turn on Integrated DLC- right up until suddenly you're ready to launch the final missions. I mean, you'll usually be able to keep stalling if you want, but I, at least, am usually impatient to win the game by that point.
In any event, Andromedon corpses have no use outside their Autopsy, so you might as well sell all such corpses once you've performed the Autopsy anytime you swing by the Black Market.
 On a different note, here's a minor oddity or error: an Andromedon will always have its glass casing completely shatter as part of transitioning to the Shell form, yet the Autopsy graphic goes with the usual corpse effect of the glass just having fractures and whatnot. Most of the Autopsy icons are slightly questionable, but the Andromedon's particularly stands out in this regard.
More interestingly, the Autopsy art has a much smaller glass casing than the 3D model. I suspect the Andromedon's design was roughly determined, the Autopsy icon made, and then the people doing the 3D end of things wanted to have the visible floppy alien body and so expanded how much of the graphic is glass so it was more visible once it was in Shell mode, with nobody thinking to update the Autopsy art appropriately. Among other points, the series of nodules running up the sides of the front look very out of place on the 3D graphic, where they're sitting atop glass, but fit smoothly into the Autopsy graphic where the glass covers much less.
-----------------------------------------

 Immunities
 Acid Blob
