Now for the Laws where you make the dark and terrible choice of advocating for workers' rights, which goes horribly wrong because Frostpunk is still wanting you to choose how things go horribly wrong with its secondary Law chain.
It does a much worse job selling this with Workers than with Engineers. I'm genuinely not sure if that's 'bad tree balance' or 'the devs have an Opinion that is showing through here'; Frostpunk has never been great at Law balance, but across the scenarios Frostpunk also tends to have a strong undertone of advocating for regular folks and criticizing leadership. I guess it could be both aspects, really.
So let's talk about those Laws.

Labor Union
Requires: Nothing.
Law Cooldown: 48 hours.
Unlocks Labor Union and initiates a quest to build it within 2 days. Completing this quest raises Motivation a little.
Alright, what's this building?

Labor Union
Costs: 50 Wood and 25 Steel.
Size 9x4 or 6x6
+1 Heat. Only one can exist at any given moment, and it cannot be deconstructed once built. Has the Food For Workers ability, which spends 100 Food Rations to reduce Strike Risk by 2 at all relevant workplaces. This ability has a 24-hour coolown.
We're looking at another weird Faith vs Order situation, in that the Engineer building needs people tied up in it while the Worker building doesn't, but not so egregious since the Labor Union doesn't actually do anything unless you spend Food Rations on its ability, wheeras the Factory Inspectorate does work just by being manned. And 100 Food Rations is a lot; you really shouldn't use Food For Workers if you can avoid it.
I consider the Worker tree largely stronger than the Engineer tree, but when you first commit, I'd argue the Engineer route is a bit stronger.
Oh, and there's Labor Union events: one pushing you to pass Worker's Council in two days, where Motivation falls if you don't make that promise, and one where you can choose between raising Motivation, raising Motivation but also raising Strike Risk for 2 days, or eat a Discontent hit for absolutely no reason.
Next Law!
Collective Bargaining
Requires: Labor Union.
Law Cooldown: 18 hours.
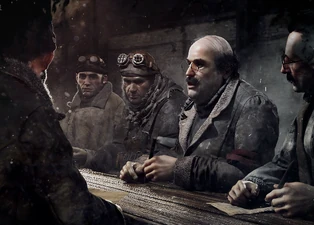
Enables the Collective Bargaining ability at the Labor Union. This ability has a 2-day cooldown and can only be activated when at least two worksites are Striking, but if the resulting Strike discussion gives a good resolution, all Strikes will be simultaneously ended at no additional cost.
This is a surprisingly strong Law; when multiple places are at risk of Striking, they tend to all go on Strike at once if any of them go on Strike, and this lets you massively drop the cost of resolving multiple Strikes for free. Its 2-day coolown also doesn't matter much unless your negotiations fail, since resolving Strikes makes Strikes at the relevant worksites basically impossible for two days. And unlike many Frostpunk Laws, there's no weird tradeoff or hidden 'gotcha' to it; it doesn't even have a negative event tied to it. (Or any event at all, actually)
I would in fact argue this is just... cleanly superior to Strike Busting over in the Engineer tree.
Next Law!
Worker's Council
Requires: Labor Union.
Law Cooldown: 48 hours.
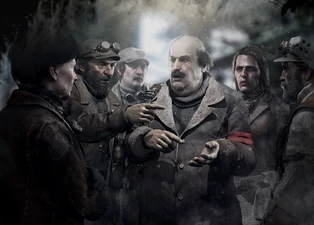
Unlocks the Council Square, initiates a quest to build one within 2 days, lowers Discontent, and slightly raises Motivation. Completing this quest slightly raises Motivation.
Wow, everybody loves this thing. What's it do?

Council Square
Costs: 15 Wood and 20 Steel.
Size 6x4
+1 Heat, can be built within the Generator Build Zone, lowers Strike Risk by 1 in all nearby worksites. Additionally, Motivation will rise slightly each day so long as one of these buildings exist, and every day a change will be proposed: most of these changes will never be accepted, but a handful will require you to make a decision in an event.
Notice that once again you don't tie up labor in this. It's just free, aside the modest resource and space costs.
Anyway, the game itself forewarns you that your Workers may come up with bad ideas they'll still want you to do, framing it as if this is the primary disadvantage of having any Council Squares, but... not really?
One of these events lets you get a free 10% progress on the current Generator construction project. Your alternate choice is to be dumb and say no, for absolutely no possible purpose. Another event is just randomly getting 10% global Efficiency for 24 hours; no cost, no decision, just free Efficiency. A third event is just randomly getting a free Motivation boost. A fourth event lets you choose to be stupid and eat a Discontent penalty for no purpose or be smart and get another free Motivation boost.
There's four events that aren't good, but three of these can be disallowed from occuring by passing Official Doctrine, and they're really not that bad anyway. (Unless you get really, really unlucky with timing, at least) They are: an event where you choose between closing all workplaces for the rest of the day (Which can fire even if there's like 15 minutes left anyway) or have Strike Risk rise everywhere for 2 days, an event asking you to promise to pass Bath House within 3 days and refusing causes increased Strike Risk everywhere for 2 days plus an increase in Discontent (Which is mostly bad because you'd rather hold Bath House for appeasing a Strike), and lastly if you have Chapel passed you can be forced to choose between getting a modest Motivation boost at the cost of Chapels no longer providing Motivation, or you can ignore that and get Strike Risk increased everywhere for 2 days plus a Discontent increase. Given Chapel mechanics, I think this last one might actually be just objectively good? Chapels don't give Motivation per day or something, they just give up to a certain amount for 100% coverage; this should effectively be just 'cashing in' that Motivation and letting you demolish extras or not build extras.
The only event you can't block and that is, y'know, bad, is Engineers complaining and forcing you to choose between a Motivation loss or a Discontent increase.
I find the Council Square exasperating for how it makes the Workers the butt of a joke in terms of having dozens of ideas that get shot down, many of which are really stupid, but if you know the full picture of possible mechanical effects, The Last Autumn is painting a surprisingly optimistic picture of a democratic process largely resulting in things working better for everyone.
If you think I'm reading too much into all this, that's probably fair, but the Council Square's handling genuinely bothered me initially, and with doing these writeups I'm actually pretty glad to find it's not stacked the way I thought, and if anything is probably stacked in the opposite direction.
Regardless, this means that mechanically it's a strong Law and a desirable building, albeit with an annoying RNG aspect where it is possible to get the 'bad' events with problematic timing, and even to a degree possible to get good events with frustrating timing. ("Yay, instant 10% progress!... when I'm less than 1% away from finishing. Thanks.")
Next Law!
Official Doctrine
Requires: Worker's Council
Law Cooldown: 48 hours.
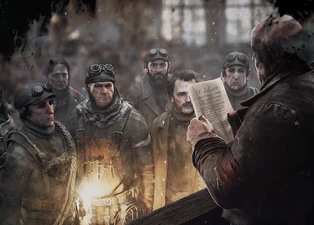
The 'bad' events from Worker's Council are no longer allowed to fire, and the Motivational Speech ability is added to the Worker's Council. This ability spends 15 Food Rations to raise Motivation, and has a 2-day global cooldown. Passing this Law also immediately raises Motivation a little.
Perhaps ironically, this Law actually produces a much worse negative event than Worker's Council itself: one event forces you to either have increased Strike Risk everywhere for 2 days, or spend a lot of Food Rations for no benefit beyond avoiding that Strike Risk.
Though its other event is choosing between 'free Motivation' and 'spend a modest amount of Food Rations to get even more Motivation plus get a Discontent reduction'. So it's still overall a positive.
Anyway, narratively, this is where the Worker Laws start to get confused as to the angle they're going ffor. You must path through Official Doctrine to get to the remaining 6 Laws, meaning it gates access to over half of the tree, but Official Doctrine is you walking back some of this 'freedom' stuff and indeed trying to coopt the rhetoric of For The People to enforce the top-ddown status quo, but only one Law beyondd Official Doctrine builds on that idea at all. I'll... get into that more later, though.
Next Law!

Propaganda
Requires: Official Doctrine.
Law Cooldown: 18 hours.
Unlocks Agitator, and initiates a quest to build 2 within 2 days. Completing this quest slightly raises Motivation.
It's our old friend the Agitator, back for another round!

Agitator
Costs 10 Wood and 10 Steel.
Socketed into a street segment, and so competes with Braziers but not other buildings. Raises Motivation based on how many manned worksites are in its radius.
It's decent. Not amazing, but hey, it no longer has to deal with 'Shrines are literally the same thing but better' -the Engineers don't offer a clear parallel at all.
It also, like the Order Agitator, comes with negative events. Plural, unlike the Order Agitator. Two events, specifically, and in both of them you choose between losing some Motivation or having Discontent rise a little. The odd thing is that they're both Engineer-centric: one is an Engineer complaining about the Agitator having Engineer-hating slogans, which fair enough, but the other one is somebody calling out you abusing the Worker-centric rhetoric dishonestly, which the game implies was probably an Engineer giving this statement? That's... odd.
In any event, this is the last Law where the people's revolution is going bad by virtue of the authorities trying to coopt its rhetoric to make people happy to stick with the status quo of being exploited. Everything past this is... a different idea.
Next Law.

Selfless Sacrifice
Requires: Official Doctrine
Law Cooldown: 18 hours.
Adds Selfless Sacrifice to all workplaces, which is a toggled ability. While active, the workplace is 25% more Efficient, but -2 Workplace Safety is applied... unless the workplace doesn't have Workplace Safety, in which case no negative ffect occurs. Passing this Law also immediately raises Motivation a little.
The wiki claims this is a purely additive modifier, just like Safety Procedures' penalty is, but my experience is that Selfless Sacrifice largely works as a multiplier, only sometimes bugging out and being added in full, much like Organ Transplants in other scnarios.
Speaking of Safety Procedures, you obviously shouldn't use them together. They give the same Efficiency modifier, but Selfless Sacrifice modifies Workplace Safety more than Safety Procedures does, so outside buggy interactions you'll normally arrive at the same Efficiency but worse Safety than if you just don't run them.
Combining it with Short Shift is less clearly terrible. You'll end up getting 10 hours of work done in 8 hours with only -1 total Workplace Safety, and if you have Work Standardization you will in fact get 10.8 hours of work done in 8 hours. This can be a sensible choice if things line up correctly, like you are entering a day only slightly over 10 hours away from completing a step in Generator construction, but the Safety numbers will cross into -3 if you just use Selfless Sacrifice by itself and so risk Accidents; combining the two in that case can let you thread the needle to get the job done that day with no Accident risk.
godly because it works everywhere, mostly for free
Next Law!

Abolition of Privileges
Requires: Official Doctrine
Law Cooldown: 48 hours.
Most worksites now accept both Workers and Engineers. (Forager Teams can still only be made from Workers) Workers assigned to jobs that previously required Engineers will only provide 75% of the Efficiency an Engineer would provide, while Engineers provide full value to Worker jobs.
Well, this is stupendously awful. Literally the only reason to pass this Law is if you want to get to the deeper Worker Laws: letting Engineers do Worker jobs is essentially completely worthless -just spend Logistical Capacity on Workers, don't waste it on Engineers you assign to Worker jobs- and assigning Workers to Engineer jobs results in reduced Efficiency, so it's not actually desirable to do things like have Workers take over an Infirmary...
... especially since it furthermore is full of negative events. If Workers are assigned to any medical building (Even if the medical building in question never sees any use), then you will eventually get an event that kills a random number of people, and you'll choose between also eating a Motivation loss or having Discontent rise and a random Worker becoming Ill. Additionally, and not at all communicated by the game, it triggers a little event chain where arson on the Generator is attempted, first giving you a choice between safety (Shutting down Generator tab jobs for 4 hours) or speed. (Workplace Safety?) Then the Engineer in question gets caught, and you can either let them become Ill for a Motivation boost, or eat a big Discontent increase.
Oh, and the first time you assign an Engineer to a Worker job you'll get an event of them complaining, but this has no mechanical effect beyond wasting your time.
It's much smarter to get high enough in Workers to get Selfless Sacrifice and then stop there: this Law is horrendous, and the ones that require it aren't exactly great either.
Next Law!

People's Militia
Requires: Abolition of Privileges
Law Cooldown: 48 hours.
Unlocks People's Militia, initiates a quest to build it within 2 days, and slightly lowers Discontent. Completing this quest slightly raises Motivation.
Well, let's look at our latest Guard Station analogue;

People's Militia
Costs: 40 Wood and 40 Steel.
Size 9x4 or 6x6
+3 Heat, manned by up to 10 Workers or Engineers at all hours of the day, slightly lowers Discontent. Upgrade of Labor Union, must upgrade Labor Union, only one can exist, cannot be dismantled, prevents construction of Labor Union. Has all Labor Union abilities.
... wow. Thanks, I hate it.
Oh, but it gets worse, because of events.
First of all, if you employ any Engineers at it, eventually one of them will die, and Motivation will fall and Discontent will rise on top of that. Then later you'll get an event where you can either bar Engineers from the People's Militia and suffer a Motivation hit, or blow off the problem, in which case Engineers assigned to the People's Militia will continue to die if they're not the majority at it. I'm not sure why you'd do this to yourself in the first place, mind, but that's bad if for some reason you do feel the need to put Engineers in this awful building.
Second, you'll get an event where you have to accept a Motivation or Discontent hit.
Third, you'll get an event where you either promise to pass Terror within 2 days, or a bunch of Engineers will be killed. But at least Discontent will fall, right?
Whatever, moving on.

Show of Force
Requires: People's Militia.
Law Cooldown: 18 hours.
Unlocks the Show of Force ability at the People's Militia, which spends 10 Food Rations to lower Strike Risk by 1 for 24 hours and heavily reduce Discontent, but a random number of people will become Ill. 24 hour ccoldown. Passing this Law also lowers Discontent a little.
Wow, thanks, I hate it.
Note that this isn't gating any other Laws, and you won't be asked to pass it. It does admittedly also function as a free Discontent reduction, as it, oddly, doesn't trigger any bad events. So the ability is extremely lame, but I guess if you've gone this far, you might as well pass it at some point just to reduce Discontent.
Okay, fine, does Terror do anything even slightly worthwhile?
Terror
Requires: People's Militia.
Law Cooldown: 48 hours.
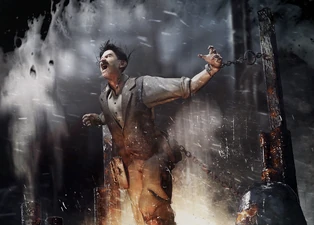
Unlocks the Execution Place, initiates a quest to build it within 2 days, and slightly raises Motivation.
It's bemusingly pointless that the Law raises Motivation:
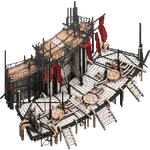
Execution Place
Costs: 50 Wood and 50 Steel.
Size ??
Passively lowers Strike Risk everywhere by 6. Each morning, a random citizen is executed after the daily Motivation drop, and upon the execution occuring Motivation is set to 100%. (Ostensibly also has a Public Execution ability?)
Yeah. Motivation maxed forever.
Is that worthwhile? Well... maybe.
In my original Medium difficulty run, I sided with the Workers but never passed Terror, and I easily completed the Generator and did the bonus objectives before the freeze occurred, and I kept Motivation above the margin to get +30% Efficiency until right after the Generator was done being built. Passing Terror would have just gotten people killed to no benefit in that run.
My first Hard run that sided with the Workers instead had to suffer through the freeze because it was unable to keep Motivation high enough to get everything done in a timely manner, dropping below the treshold somewhere in Phase II of building the Generator. However, I also had some misplays from testing mechanics and misrembering some of the event stuff, as well as from not having dug into things enough to know things like that People's Militia is what specifically triggers the arson event. So for that run in particular, maybe I'd have been better off pursuing Terror, but it wasn't remotely necessary, and I couldd certainly have done better than I did without pursuing Terror.
My first successful Extreme run
---------------------------------------
Much like Faith is forced at the last second to swerve rapidly toward being extremely evil because the devs precommitted to the idea that both Purpose paths are roads to terrible choices, siding with the Workers suffers a lot from the fact that the devs are committed to the idea that both choices can lead to horrendous outcomes but the devs don't really have a clear thought process for how siding with the Workers can truly be equivalently evil to siding with the Engineers. The tree is a weird mess of incoherent possibilities: the Worker's Council sort of gestures at the idea that maybe the uneducated Workers will make stupid decisions if they have a say in how things ought to run, but the game doesn't seem to really believe that justification for a ruling class existing, not within Worker's Council itself, and and not anywhere elsee in the tree.
Official Doctrine, Propaganda, and arguably Selfless Sacrifice (There's a clear parallel to Forced Labor, just Selfless Sacrifice gets the positive spin, so you could view it as 'Forced Labor as enabled through good propagandda rather than direct violence') instead suggest that maybe this tree goes badly not because the concept is inherently flawed, but instead because it becomes corrupted by the powers-that-be to reinforce and even worsen the existing status quo of exploitation.
Then at the end the tree swerves again, this time gesturing to the idea that the danger is that the Workers will take the whole 'class warfare' thing too far and ultimately just start murdering people for having benefited from the system rather than actually trying to reform the system into something with no such serious imbalances in status.
It also strains once more against the limits of the game's framework. I actually kind of like the experience of the event that pressures you to pass Terror: the actual narrative context is that you've got Workers just casually going 'yep, we're off to murder some bourgeoisies' and the game explicitly notes that they're 'not asking'. One of the realities of anything political is that setting the ball rolling doesn't mean you truly have control over the thing: a mass movement is what the participants make of it, and it's easy for a person to find that something they started ultimately becomes something they're horrified by, and this event is a pretty compelling depiction of that type of experience...
... but the Laws framework is, fundamentally, something the player is the sole controller of. The horror of watching a social movement unfold and transmogrify into something you Don't Want is hampered heavily by how tightly the reins of power are bound to the player's hands, made worse by 'meta' knowledge aspects and other risks: for example, if my original Hard mode run had been occuring more closely after my Medium difficulty run (They ended up being multiple weeks apart, largely due to meatspace issues), I'd have remembered my original conclusion that the People's Militia is terrible and most of the Laws behind it were terrible, and I wouldn't have passed it and so never been at risk of having this experience. Similarly, having drawn up this series, I'm not going to make that mistake in future runs now that I explicitly know it's the People's Militia that allows that event to fire, and anyone who's read this page can also dodge it effortlessly. So while that moment can work decently for a player bumbling cluelessly through the scenario, it's not guaranteed, and The Last Autumn doesn't really have the capacity to run with that notion more broadly.
In more pure mechanical terms, the Worker tree is also just wildly uneven in quality. While I consider it overall stronger than the Engineer tree, this is mostly because of a mixture of 'the Engineer tree demanding a lot of Engineers to function is a fundamental flaw' and 'the early portion of the Worker tree has a good supply of decent-to-great Laws'. Abolition of Privileges is thematic, but mechanically horrendous, while People's Militia and Show of Force are less absurdly terrible but are still very lackluster, and Terror is, even aside the whole 'moral ickiness' aspect, entirely possible to be deaths for functionally no benefit.
I'd say the Workers vs Engineers choice is better-balanced than Order vs Faith was, but the whole thing is still a mess, both thematically and mechanically.
On the plus side, the devs do seem to at least have recognized that it was problematic for Order and Faith to have different total hours of Law cooldown: whether you side with Workers or Engineers, passing all of their Laws will take the same amount of time in total. There's still jank from eg the fact that Engineers has a lot of its value tied up in actually reaching the end vs Workers being able to be very powerful just stopping pretty early, but that's about the more difficult parts of balance to manage, not a straightforwardly obvious 'these two numbers should not be different' issue.
---------------------------------------
Next time, we get started on techs and buildings, specifically covering the Generator tab.
See you then.